
In the ever-evolving landscape of automotive spare parts, the name Delco Remy stands as a beacon of exceptional quality, innovative prowess, and a rich legacy. The roots of Delco Remy trace back to the early 20th century. What commenced as a modest enterprise has since blossomed into Remy International Inc., a global force synonymous with cutting-edge technology and superior products. Today, Delco Remy’s impact is felt far beyond its origins, offering a diverse range of products, including starters – a fundamental component in a vehicle’s ignition system.
Going ahead, this article provides insights into Delco Remy starters and their installation process.
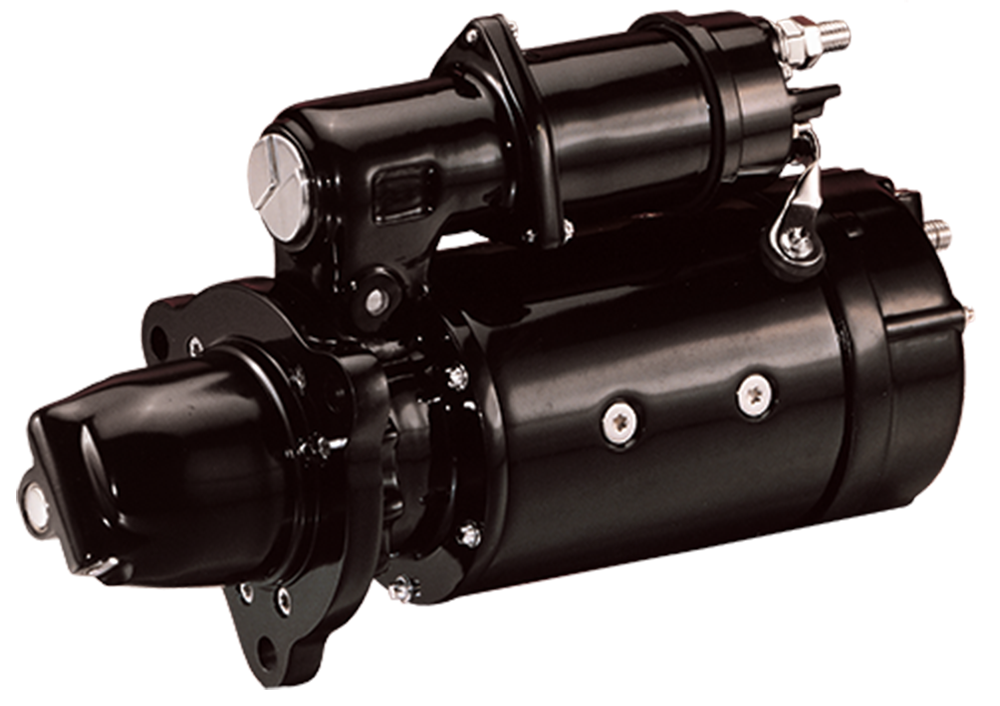
About Delco Remy Starters
At the core of every vehicle’s ignition system resides the starter – a seemingly modest component with profound implications. Delco Remy starters aren’t mere devices. They are the embodiment of precision engineering, crafted not only to initiate engine operations but to do so with reliability and optimal efficiency. These starters aren’t fleeting investments. They’re engineered to endure the rigours of daily usage, ensuring that every engine ignition is a smooth, seamless experience.
How to Install a Delco Remy Starter?
While installing a Delco Remy starter might appear daunting, a methodical approach can transform it into a satisfying endeavour. Here are the steps for the installation process:
Step 1: Getting The Right Specs
Before starting the installation process, it’s essential to ensure that you possess the exact starter model that impeccably matches your vehicle’s specifications. This entails meticulous cross-referencing, comparing your vehicle’s make, model, and engine intricacies with the comprehensive Delco Remy catalogue to ensure an impeccable fit.
Step 2: Be Prepared and Install Safely
In the realm of automotive components, safety is non-negotiable. To guarantee a secure and incident-free installation, it’s imperative to gather the essential tools, ranging from wrenches and sockets to safety goggles. Initiating the process on level ground with the vehicle’s ignition switched off and the battery disconnected serves as a crucial safety buffer against accidental electrical complications.
Step 3: Removing the Old Starter
An analytical mindset is indispensable when dealing with existing components. Locating the old starter, often placed near the engine’s flywheel housing, marks the starting point. However, the process entails more than mere discovery. Commencing the removal process involves disconnecting the battery’s negative terminal, a precautionary measure against unintended electrical discharges. With safety at the forefront, proceed to detach the electrical connections linked to the starter – the power cable and solenoid wires. The subsequent phase involves the careful extraction of bolts securing the starter to the engine.
Step 4: Repositioning the IMS
Certain iterations of Delco Remy starters boast an additional component: the Integrated Magnetic Switch (IMS). Ensuring its accurate positioning before installation is crucial. Proper alignment of the IMS plays a decisive role in the starter’s seamless operation.
Step 5: Mounting The Starter
Having navigated the preparatory stages, it’s time to move ahead with the installation of the new Delco Remy starter. Precision becomes paramount as you align it meticulously with the designated mounting holes on the engine. The subsequent task involves inserting and tightening the mounting bolts with a calculated hand. A word of caution: avoid excessive torque, as it could potentially jeopardise the starter or the integrity of the mounting surfaces.
Step 6: Electrical Connections
As the installation draws nearer to its conclusion, it’s imperative to turn your attention to the intricate web of electrical connections. This phase commences with attaching the power cable, followed by attaching the solenoid wires. Each connection requires meticulous attention – a snug and secure fit is critical. With all electrical connections securely in place, the final step involves reattaching the negative terminal of the battery, ensuring that the installation process is completed safely.
Things To Keep In Mind Before Installation
Consider the following factors before you begin the installation of your Delco Remy starter to ensure a smooth process:
Note the Design Change:
In an era of rapid technological evolution, the design of Delco Remy starters might change. Hence, you must verify that the new starter corresponds with the design and specifications of the previous counterpart used in your vehicle.
Ensure the OE Spacer is in the Correct Location
Some vehicles demand the presence of an Original Equipment (OE) spacer to facilitate the optimal engagement of the starter. Prior to mounting the starter, thoroughly check to validate the accurate placement of the spacer.
Make Sure the IMS is Equipped and Positioned Correctly
Starters equipped with the Integrated Magnetic Switch (IMS) necessitate meticulous attention. Confirm the presence and precise alignment of the IMS in the starter’s performance.
Drain Opening Locations
A subtle yet significant consideration involves the drain openings on the starter. Ensuring their correct placement is important in preventing moisture-related issues that could potentially compromise the starter’s functionality.
Starter Cable Lengths
An aspect often overlooked but no less vital is the length of the starter cables. Ensuring they are appropriately dimensioned prevents undue strain or tension on the components, optimising the starter’s overall performance.
Before You Use Your Vehicle
It is wise to reflect on additional factors that can substantially influence the long-term health of your Delco Remy starter:
Ring Gear Damage
The harmonious interplay between the starter and the engine’s ring gear is a linchpin in successful engine initiations. As a responsible vehicle owner, a meticulous inspection of the ring gear for signs of wear or damage is an important step to avoid compromised starter engagement and potentially premature failure.
CCA Damage from Batteries
Cold Cranking Amps (CCA) quantify a battery’s resilience in commencing vehicle operations under cold weather conditions. In situations where the vehicle encounters struggles in starting, the strain imposed on the starter can result in damage. Ensuring that your battery’s CCA rating aligns harmoniously with your vehicle’s prerequisites is a pivotal measure to uphold your starter’s longevity.
Ensuring Proper Starter Cable Lengths: An Overlooked Key to Performance
While installing a Delco Remy starter, meticulous attention to detail can make all the difference in its performance and longevity. One often overlooked yet critical aspect is the length of the starter cables. These cables play a vital role in transmitting the electrical current from the battery to the starter motor, initiating the engine’s operation.
Incorrectly sized or improperly routed starter cables can lead to a range of issues. Excessive tension or strain on the cables can hinder the efficient flow of electrical current, affecting the starter’s ability to crank the engine. This not only compromises the vehicle’s overall performance but also places unnecessary stress on both the starter and the electrical system.
To ensure optimal starter cable lengths:
Inspect Existing Cables
Before beginning the installation process, take a close look at the existing starter cables. Check for signs of wear, fraying, or corrosion. If any issues are detected, it’s advisable to replace the cables before installing the new Delco Remy starter.
Choose the Right Size
When selecting replacement starter cables, ensure they are of the correct length for your specific vehicle make and model. Using cables that are too short can strain the connections, while excessively long cables can become tangled or kinked, impeding the electrical flow.
Mind the Route
During installation, carefully route the starter cables to avoid sharp edges, moving parts, and areas of high heat. Securing the cables with proper clamps and ensuring they have sufficient slack prevents undue tension that could lead to premature wear.
Proper Terminal Connections
When attaching the starter cables to the starter motor and battery, ensure the terminal connections are clean and securely fastened. Loose connections can result in voltage drop and decreased starter performance.
By paying close attention to starter cable lengths, you contribute to the seamless operation of your Delco Remy starter. A well-installed starter, supported by properly sized and routed cables, not only enhances your vehicle’s overall reliability but also contributes to a smoother engine start, even in challenging conditions.
Incorporating this often-overlooked step into your installation process showcases a commitment to precision and diligence, ensuring that your starter functions optimally and delivers the reliable performance you expect.
We Are a Trusted Auto Spare Parts Distributor in India
Unlock a world of automotive reliability and performance with us – your trusted auto spare parts distributor in India. At Krishna Auto Electric, we don’t just provide automobile parts. We deliver peace of mind. With a legacy of trust and excellence, we bring you a curated selection of genuine auto spare parts that are a perfect fit for your vehicle’s needs.
Our commitment to quality ensures that every part we offer is sourced from reputable manufacturers, guaranteeing durability and optimal performance. Whether you’re a car enthusiast or a professional mechanic, our extensive range of spare parts caters to a wide range of vehicles and requirements.
Say goodbye to worries about compatibility or subpar quality. Join our huge base of satisfied customers who have chosen us as their go-to partner for all their auto spare parts needs.
Explore our inventory, and let us be your reliable companion on the road to exceptional automotive performance.
Contact us at +(91)-84889-68382 or +(91)-97123-63530 to learn more about our products and services. Alternatively, you can email us at krishnaautoelectric@yahoo.com according to your convenience. We will be happy to assist you.